Home Improvement

  • Home
  • About
  • Contact Us
  • Privacy Policy
  • Cookie Privacy Policy
  • Terms of Use
Home Repair Tips For Home OwnersHome Repair Tips For Home Owners
Floor Refinishing Projects For Your HomeFloor Refinishing Projects For Your Home
Tips On How To Roof A HouseTips On How To Roof A House
Tips On How To Finish A BasementTips On How To Finish A Basement
House Painting Tips So Your Home Looks AmazingHouse Painting Tips So Your Home Looks Amazing

Home Repair Tips For Home Owners

By H0tN1cH3S

Do you own a piece of residential property? If so, it is your responsibility to keep the land and buildings in good condition. Whether you have just picked up a fixer-upper or live in a newer stick-built home, you should prepare for home repair situations to arise.

Couple working together on home renovation, woman holding spirit level tool, man holding hammer.
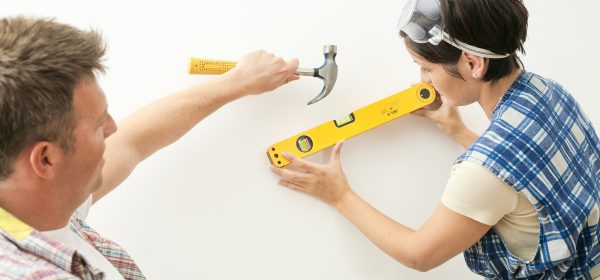
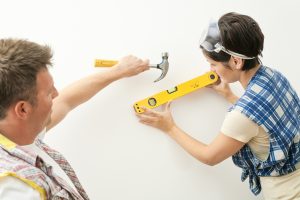
What is your level of knowledge and expertise for basic construction work? Be honest with yourself about your abilities so you can get outside help when needed. You are likely to build up more repair costs to correct your mistakes, on top of fixing the original problem.

If you are going to hire a contractor, you should obtain quotes from three to five separate companies. This will ensure that you get the best rates and have a satisfactory experience. For larger jobs you might need a general contractor to work with various sub-contractors to complete the job.

Either way, you need to make certain that you hire a reputable business. You can ask folks that you know for recommendations or look online to find contractors advertising in your area. You can begin to compare them once you have compiled your list.

First, check the business websites to investigate their presentation. Can you find their contractor number, claims of insurance and other types of professional verification? Does the business have any affiliations or accolades from reputable sources? These help to prove the legitimacy and professionalism of the contracting company.

Next, you need to look up reviews for each of the home repair contractors. One at a time, enter the company name into your favorite search engine. Before you strike the “Enter” key, you should add the word “review” to your search query.

Click on several of the results and scan through them. Stick with sites that don’t accept money from businesses in order to remove bad reviews. Focus on ones that have been left within the past year, because older ones might not be indicative of the current business model and staff.

Eliminate any of the businesses that did not hold up to closer scrutiny. If any of them stand out at this point, you should move them to the top of the list. Once you have met with a representative and obtained quotes, you can proceed according to your needs and their availability.

On the other hand, you might decide to tackle some repair projects on your own or with the assistance of a friend or family member. If so, make sure that you have all of the materials and equipment ready beforehand. You need to have clear instructions for each step of the repair. Watch videos and read repair manuals repeatedly if you have any questions or uncertainty about any part of the process.

Whether your personal home has problems or you are flipping older residential properties, it is essential that the repairs are done right the first time. If you can perform the repairs yourself you might be able to save some cash, while hiring a reputable contractor can save you time and headaches. The choice is yours to make.

Filed Under: Home Repairs Tagged With: Repair Tips

Floor Refinishing Projects For Your Home

By H0tN1cH3S

If you have hardwood floors at your home that have a very dull appearance, it might be time to refinish your floors. Over the years, dirt can become trapped in the upper layer of the floors, creating this unsightly appearance. It is a project that is best suited for dry conditions. This is because will it is a very porous material. You will be stripping off the upper layer of the sealant that was used, and this will expose the natural wood which could absorb moisture. If you are able to choose a few days that are nice outside, this is a project you can complete on your own. Here are some of the best strategies to use with floor refinishing projects that can help improve the interior of your home.

New home with beautiful hardwood flooring in living room area
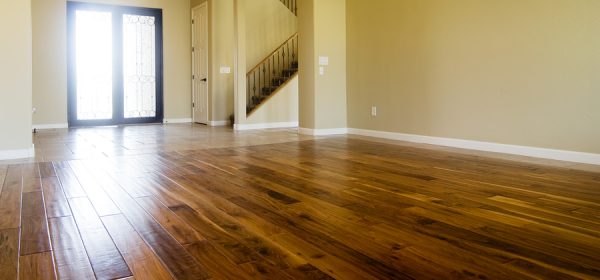
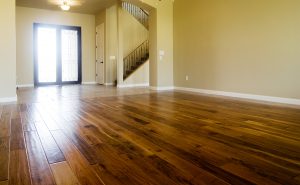
Two Ways To Refinish Your Hardwood Floors
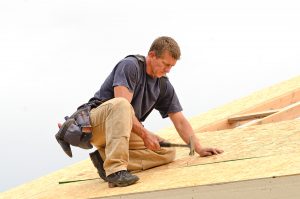
There are two separate strategies you can use to improve your hardwood floors. First of all, you could do a complete refinishing project. This will require you to sand the entire surface of the floor down to the wood. The other option is to only take off the top coating of the polyurethane sealant. The choice that you make will be dependent upon what type of stains that you are seeing. If water has discolored the wood, or if there are deep scratches, a full refinishing project should be completed. However, if there are only minor scratches, and a slightly dull appearance, then you will do what is called a screening refinishing project.

Tools And Equipment You Will Need

You will need several different types of tools including a hammer, fan, drum sander, large palm sander, and a respirator or dust mask. You will also need the sanding discs to sand the upper layer of the polyurethane off, or to take it down all the way to the wood. The equipment that you will need will include painters tape, plastic sheets, wood putty, and polyurethane. Low VOC stain is also recommended, along with old socks that you can use to apply it.

How To Begin Your Floor Refinishing Project

You will initially move everything out of the room before you start. The plastic and tape will be used to block all of the doorways in and out of the area. You should have an open window so that you can blow out the dust, even if you are wearing a dust mask or a respirator. If there are any holes or deep scratches, you need to fill these with putty using your putty knife. Also look for nail heads that could be coming up and out of the wood. You will tap these back in using your hammer and nail set. Once all of that is done, you will be ready to begin sanding down your floor.

Start Sanding Your Floor

It is recommended that you use a drum sander which you can rent from home improvement stores. These will use the sanding discs with a 60 grit designation. You need to complete sanding the entire floor with the same grit paper to keep everything as consistent as possible. As you are moving forward and sanding down the floor, never engage the sanding discs while you are stationary. You will end up with circular marks on your floor, and these are almost impossible to remove. You should go in one direction until reaching the other side, disengage, turn around, and then start again. Once you have completed the entire floor, you will use the palm sander which is specifically used at the edges of the room. After turning everything off, you will then vacuum up the remaining sand, and use a damp cloth to get the rest. This completes the sanding process, leading to the staining of your floor.

Apply Stain And Protective Finish On Your Floor

The next part of the process is to stay in your floor. This can be done with the socks and stain that you have purchased. It is recommended that you wear some type of latex gloves to prevent staining your hands. Once it is dry, which may take a day or more, you will then apply the polyurethane protective finish. It is recommended that you use a water-based finish because it will dry faster, and will also produce far fewer noxious fumes.

After waiting another day, your floor will be complete. This entire floor refinishing project could be done over the weekend. It is recommended that you wait an entire day after you have added the polyurethane just to make sure it is completely dry. As long as you follow these steps, you should be able to complete the project in 2 to 3 days without incident. If you have a large area, this could be very time consuming, but it will be well worth the effort.

Filed Under: Floors Tagged With: Refinishing Floors

Tips On How To Roof A House

By H0tN1cH3S

If you have decided to roof your own house, perhaps to save money, you might not realize how difficult this process is. There are many steps involved, and several different types of material that are used, in order to complete this process. It is recommended that you start this process during a time of the year when the weather is relatively mild. Although you could cover your exposed roof if a rainstorm comes through, it’s better to keep everything perfectly dry. Here is a brief overview of how you can do this on your own. It will require a couple weeks, especially if you have a large home. Here are a few tips on how to roof a house if you would like to attempt to do this on your own.

Framing contractor installing roof sheeting over rafters on a new commercial residential construction projectRoof A House

The first thing that you will need to do is take measurements of your roof. This will allow you to determine how much material you will actually need. By measuring the length and width of the roof, along with the pitch or angle of the roof, you can calculate the square footage for the entire project. There are roof calculators online that will allow you to enter this information in. This can give you a rough estimate of how much roofing material you will need. In this example, we are going to focus on using asphalt shingles, one of the most inexpensive and easiest materials to use.

Tools And Materials You Will Need

The tools that you will need will include a shingle remover, hammer tracker, roofing hammer or nailer, and a ladder to get you up and down. The materials that you will need will include the asphalt shingle bundles, roles of felt paper, underlayment roles, flashing, and nails. The estimate that you receive from the calculation online will tell you how many bundles of asphalt shingles you will likely need to purchase. Workers out the home improvement store will likely recommend how much of the other materials you will need in order to complete the project.

Where To Begin

It is always recommended that you remove your existing roof first. Although you could put another roof over your existing one, it is not recommended if that particular roof is decades old. By removing the existing roof, you will also be able to see if there are any problems such as dry rot on the particleboard or MDF material. If so, that can be replaced, and then you will begin to roll out the underlayment that can prevent moisture from getting through.

This will be followed by a layer of tar paper, which is the felt paper that you also purchased. Before you put on the shingles, you need to install flashing in any valleys that you may have if the roof is not completely level. You will then begin with the starter shingles on the bottom edge, half an inch over the drip edge. Next, you will begin to place the shingles horizontally in rows, going all the way to the top. Once you are at the top, you will complete the process with ridge cap shingles that will go from one end of the roof to the other. This will complete the process of doing your own roof, a project that can take anywhere from several days to a couple of weeks.

Now that you know how to roof a house, this might be a project that you may want to consider doing. The most difficult part of the process is preparing everything before you start to nail down the asphalt shingles. Once you get going, you will be able to complete row after row, until you are at the top. As long as you have done your measurements properly, you should only have a small amount of material left over. It is a project that most people will be able to complete as long as they have a standard roof with a pitch that is not too steep.

Filed Under: Roofing Tagged With: How To, Roof A House

Tips On How To Finish A Basement

By H0tN1cH3S

If you have always wanted to finish your basement to convert it into living space, you can do this very easily. Many people believe it will be too expensive or complex to complete on their own.

Depending upon the size of your basement, and what you would like to accomplish, it may only take a week or two to finish everything. At the very least, it will improve the value of your home and provide more living space. Here are a few tips on how to finish a basement, a project that you should consider doing this year.

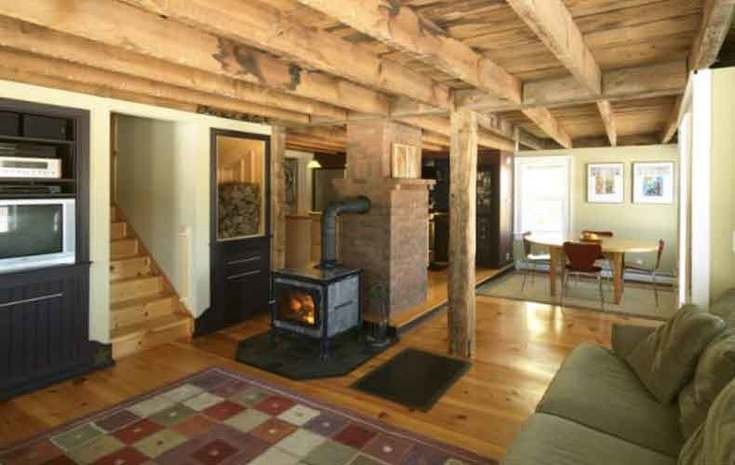
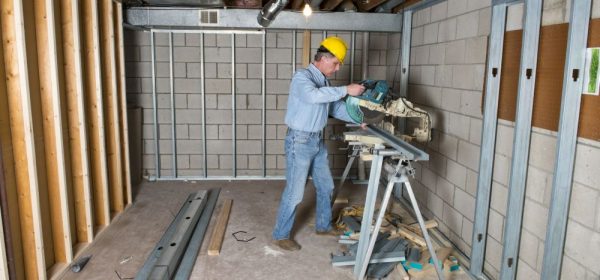
What You Can Do With Your Basement

Most basements are designed to be a type of storage area. This is where people will store boxes of their belongings, or excess furniture that they do not want to sell. However, if the basement is large enough, it can serve as another bedroom. Others will convert this into a game room or den. It is also in a prime location for creating a home theater room. You will be able to play your movies as loud as you want. To convert your basement into any of these possibilities, it begins with framing and insulating this area.

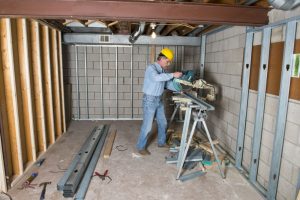
Start With Framing And Insulating Your Basement

To transform your basement into a room, you must begin by framing the basement. You may have to have plans drawn up and submitted to your local building department. Your plans will include the walls, doorways, and special features such as adding a fireplace. You also need to check for mold and leaks that may be occurring. Once these problems are resolved, you can then begin to frame the basement area. The installation should be extruded foam insulation. This will be glued to the foundation walls and rim joists. Also use high R-value insulation, and avoid expanded foam insulation which is not as durable. Once done, you will caulk any seams or gaps, followed by sheet rock on the interior of the framing. This should only be done once you have added all of the electrical wiring and sockets.


How To Finish A Basement Remodeling Project

To complete the job, you can spackled the outside of the drywall, and then subsequently paint everything. It is recommended that you use some type of semi gloss, similar to what you would use in the kitchen or bathroom area. This will make it easier to clean, and will also help promote the distribution of light when using brighter colors. The entire project will be complete once you have added tiles or carpet to the floor. You will also need to bring all of the furniture that you want into this newly improved basement area. This process may take several days to complete, but it will be well worth the effort.

This project is one that many people think about doing, but often do not because they believe it to be too difficult. It will only require a minimal amount of materials, and a few weeks of your time, to create the plans and complete the project. Instead of just using your basement as a storage facility, it can be so much more. Now that you know how to finish a basement, you should start thinking about all of the different ways that you could use this area of your home.

Filed Under: Home Repairs Tagged With: Basement, Remodeling

Next Page »

Recent Posts

  • Home Repair Tips For Home Owners
  • Floor Refinishing Projects For Your Home
  • Tips On How To Roof A House
  • Tips On How To Finish A Basement
  • House Painting Tips So Your Home Looks Amazing
  • Home
  • About
  • Contact Us
  • Privacy Policy
  • Cookie Privacy Policy
  • Terms of Use

Tags

Anything in here will be replaced on browsers that support the canvas element

  • Painting Walls
  • Basement
  • Remodeling
  • How To
  • Roof A House
  • Refinishing Floors
  • Repair Tips

Copyright © 2023 ยท Log in